
Why gRPC and what are the benefits of it?
gRPC is a modern, high-performance, open-source remote procedure call (RPC) framework that can run anywhere. It enables client and server applications to communicate transparently, and makes it easier to build connected systems. Some of the benefits of using gRPC include:
- High performance: gRPC uses a compact binary format for data serialization, which is faster and more efficient than text-based formats like JSON or XML. It also uses HTTP/2 as the underlying transport protocol, which allows for efficient multiplexing of requests, streaming of data, and low-latency communication.
- Cross-language compatibility: gRPC uses protocol buffers as the interface definition language (IDL), which allows for language-agnostic contract definitions. This means that you can use any supported language to define the service API, and the generated code will be compatible with any other supported language.
- Simplified API development: gRPC provides a simple, modern API for building distributed systems, which makes it easier to develop and maintain complex, connected systems. It also provides tools and libraries for automatically generating API client and server code from the service definition, which can save a lot of time and effort.
- Improved reliability: gRPC includes features like automatic retries and backoff, flow control, and deadlines to help ensure that your system is reliable and responsive. It also supports bi-directional streaming and cancellation, which can be useful for building real-time, interactive applications.
Overall, the use of gRPC can help improve the performance, reliability, and simplicity of your distributed systems.
Building the Server Application
Requirements for the Guide
For our setup we have multiple requirements, make sure you have the following installed:
You further need a Google Cloud Account with Billing enabled. The whole deployment should cost anything, as we are staying within the Free Limits of the Various products.
Create the Protocol Buffers
I want to keep the Setup as simple as possible, therefore we build a really basic Ping Service which provides two Methods.
- Respond to a Ping an include the provide Name
- Respond with a Version of our Service
We put the Protocol Buffer definition in it’s own Folder called ping and
create a file named ping.proto in there.
|
|
In there we define our services & types. If you want to learn more about the details of the Protocol Buffers, check our the official guide.
|
|
We are defining our Service Pinger which has the two Methods we outlined
above. One important thing is that you always need to define a Received type,
even if it’s empty as in our case with the VersionRequest.
Now we can build our Protocol Buffer file into Go code, which we then can use in our program.
|
|
This creates two additional files in the ping folder
|
|
When you inspect these files, you see that the contain a lot of Go Boilerplate.
Our next step is to implement the logic to handle the defined Methods.
Create the Server
To separate our code a bit, I put the server code into it’s own folder called server.
There I created a simple main.go file, which will run as server on Google Cloud.
|
|
Now we need to add the generated Protocol Buffer files into the Server folder as well, this makes it easier to let Google Cloud build our code later on.
Create a ping folder inside of server and copy the two *.go files into
this newly created folder. Then we init the go module with go mod init grpc-gcloud and then follow up with a go mod tidy to download the required
dependencies.
Now we should have the following structure.
|
|
If you now go into the server folder, you can launch your Server and should see the following message.
|
|
Testing the Server with gRPCurl
I was curious if the server is already working, there are multiple tools that
can be used to invoke gRPC Services. One is gRPCurl which is, you guessed it,
a curl like implementation for gRPC.
This step is optional, but if you are curious go ahead and install gRPCurl.
Then you can invoke your service, directly from the root of your project:
|
|
And should get the matching output:
|
|
This looks already good! Another option is to use Insomnia or or Postman
Testing the Server with Insomnia
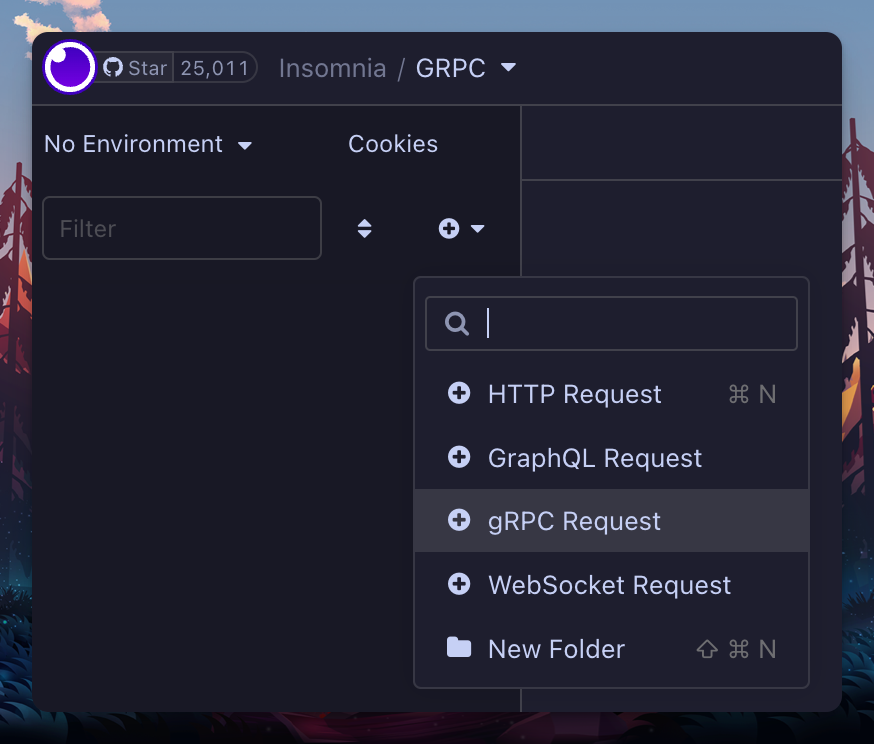
In Insomnia you have to first create a new gRPC Request, make sure to select the gRPC option, otherwise it wont work.
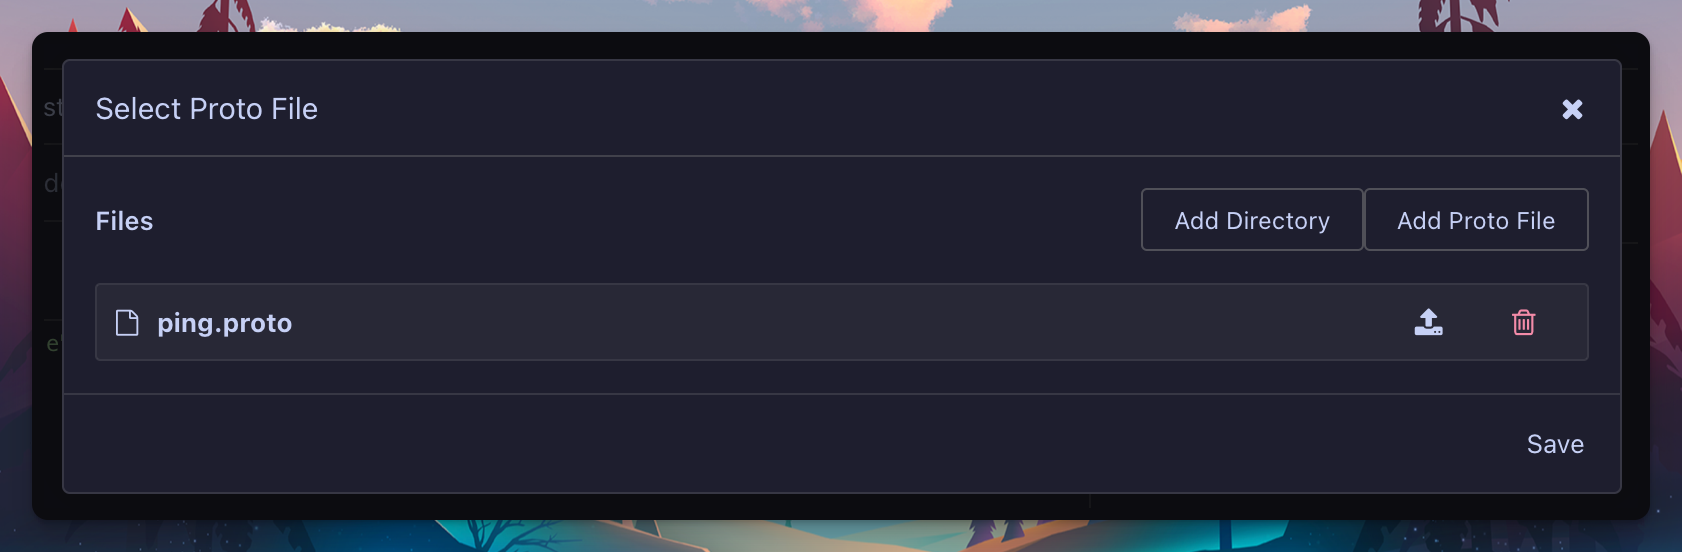
The next prompt asks for the proto file to use, here you can already see the benefit of the whole gRPC story :)
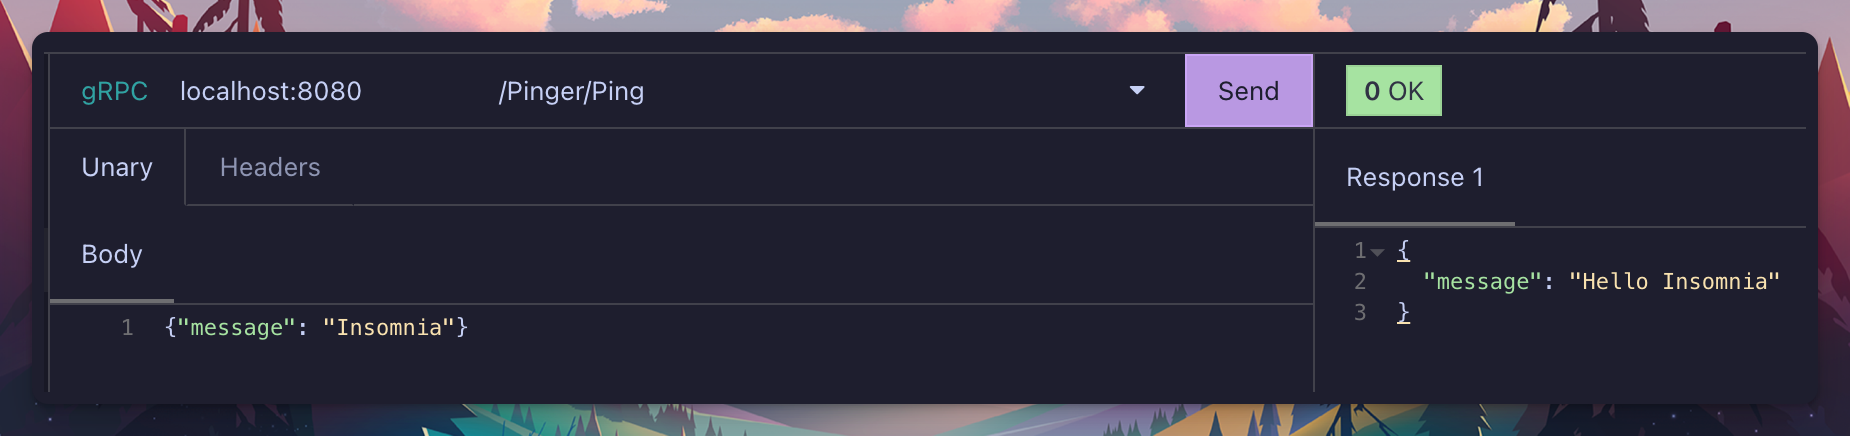
Now you only have to fill out the server address localhost:8080 and select the Method you want to use.
The Body is optional, it can be left blank or you can specify a message.
Deploy the Server to Google Cloud
Our new server is now ready to be deployed to Google Cloud. For this we create a new project (feel free to use an existing one, if you are familiar with google cloud).
Setup of the Google Cloud project
|
|
This take a little bit of time, but then you should see the new project in the projects list.
|
|
This means we are good to go, now let’s deploy our code to a google cloud run instance, it’s the serverless offering from google cloud. First we need to enable billing for the newly created project, if you don’t have a billing account you need to create one first
Then you can grab the ID via
|
|
And then link it with the new project
|
|
After that we can enable the required services for our new project.
|
|
Now is a great time to grab a coffee, as you have to wait a couple minutes before the services are ready to be used. If you try it too early, you will get a fault along the lines of:
|
|
Deploying the code to Google Cloud
We directly deploy two variations of our service, one without authentication and one with.
|
|
There are different options for the deployment:
- You can build locally and upload the container images
- You can define a Dockerfile and let Google build based on that
- You can use the –source variant (Which we use here), Google then uses a magic template to deploy your code :)
After you run above command, you will have twice the url information in your output.
|
|
This can now be plugged into the same gRPCurl and Insomnia commands that we used before. But you need to change it a little bit, so for gRPCurl the command would be.
|
|
Main difference is that we remove the -plaintext flag, as google does by default tls for us. We also have to add the port to the url. This command should work and return you a message from the service that runs on Google Cloud!
For Insomnia you have to prefix the url with grpcs:// that the call works
again. Otherwise you will get an error “13 Received RST_STREAM with code 2
(Internal server error)” which doesn’t really help…
On the other hand, the -auth version should throw a 403 error. Let’s fix this
now and write our go based gRPC client.
Building the gRPC Client Application
Alright, so far we created and deployed our server. We did some validation with Insomnia and the gRPCurl tools. Now it’s time to tackle a client in Go, which can talk to our server.
Client code
We put our client in its own directory. There I have a client.go file, which
contains the go code. I also put the two *.go files from the ping folder into
a ping subfolder inside of the client folder.
|
|
Then we also initialize this subfolder as go module. I used the same name, but this is probably not best practice :)
|
|
Service Account
To allow access to the Authenticated version of our gRPC Service, we need a service account which has the rights to invoke the service.
This can be done in the portal or directly through the gcloud CLI.
|
|
After we created the service account, we can fetch the service-account.json for it.
|
|
You have to enter the IAM account in the format
Then we need to allow the user to invoke our Google Cloud Run Service
|
|
Go code
Now you are ready to let the client run, this is the sample code we are using.
|
|
|
|
Github Repo
I put the whole code into a Github Repo check it out and let me know if there are any questions!