What is Postman?
Postman started as an API Client to allow for easy testing and working with APIs. You could compare it to a Browser that you use for accessing traditional webpages, but for APIs. Instead of having to write code, you can leverage Postman to do the first interaction with the target API.
With new versions of Postman, their focus shifted a bit, and now it’s advertised as “an API platform for building and using APIs”. For the sake of this Guide, we focus on the API client functionality.
What is Postman used for?
With Postman, you can generate and test API calls against your favorite API. Compared to writing code, Postman provides much faster iteration & development cycles.
I use it in the prototyping & early development phase to better understand the API I’m working with. It further helps me to test the different API endpoints and options that are available.
What is the REST API in Cisco ACI?
Cisco ACI is built with an API first approach, everything you see and do in the GUI is an API call in the end. The GUI is just another API client itself!
Compared to more traditional Cisco products, which offer a limited API in most cases, in ACI you can do everything through API. This allows for powerful automation of all aspects in the ACI fabric.
Basics of the REST API
There are two concepts that are important to understand, Classes & Objects. The whole ACI fabric is made up of different objects and all of them are based on different classes. This is the abstraction that was used by Cisco to represent the configuration to the user.
Let’s look at an example to better understand the difference and how it
matters. For example, an ACI Tenant is represented through the fvTenant
class. An instance of this class would be a Tenant object, for example
tn-TEST, which is a tenant called Test.
dMIT and the hierarchy of objects
The distributed management information tree (dMIT) of ACI hosts the whole configuration. As the name suggest, the configuration is built in a tree like hierarchy.
- Objects have parents/children
- Objects can reference other objects
- Depending on the type, objects can be reused
Each of this object also have a unique and absolute identifier, called DN
or Distinguished Name. This DN also shows the path of the object in the dMIT.
If we look back at our tenant, it’s DN would be uni/tn-TEST, this tells us
that a tenant is directly attached to the root (uni is the root).
How to use Postman with Cisco ACI?
First you need to grab Postman, do it through Brew brew install postman or
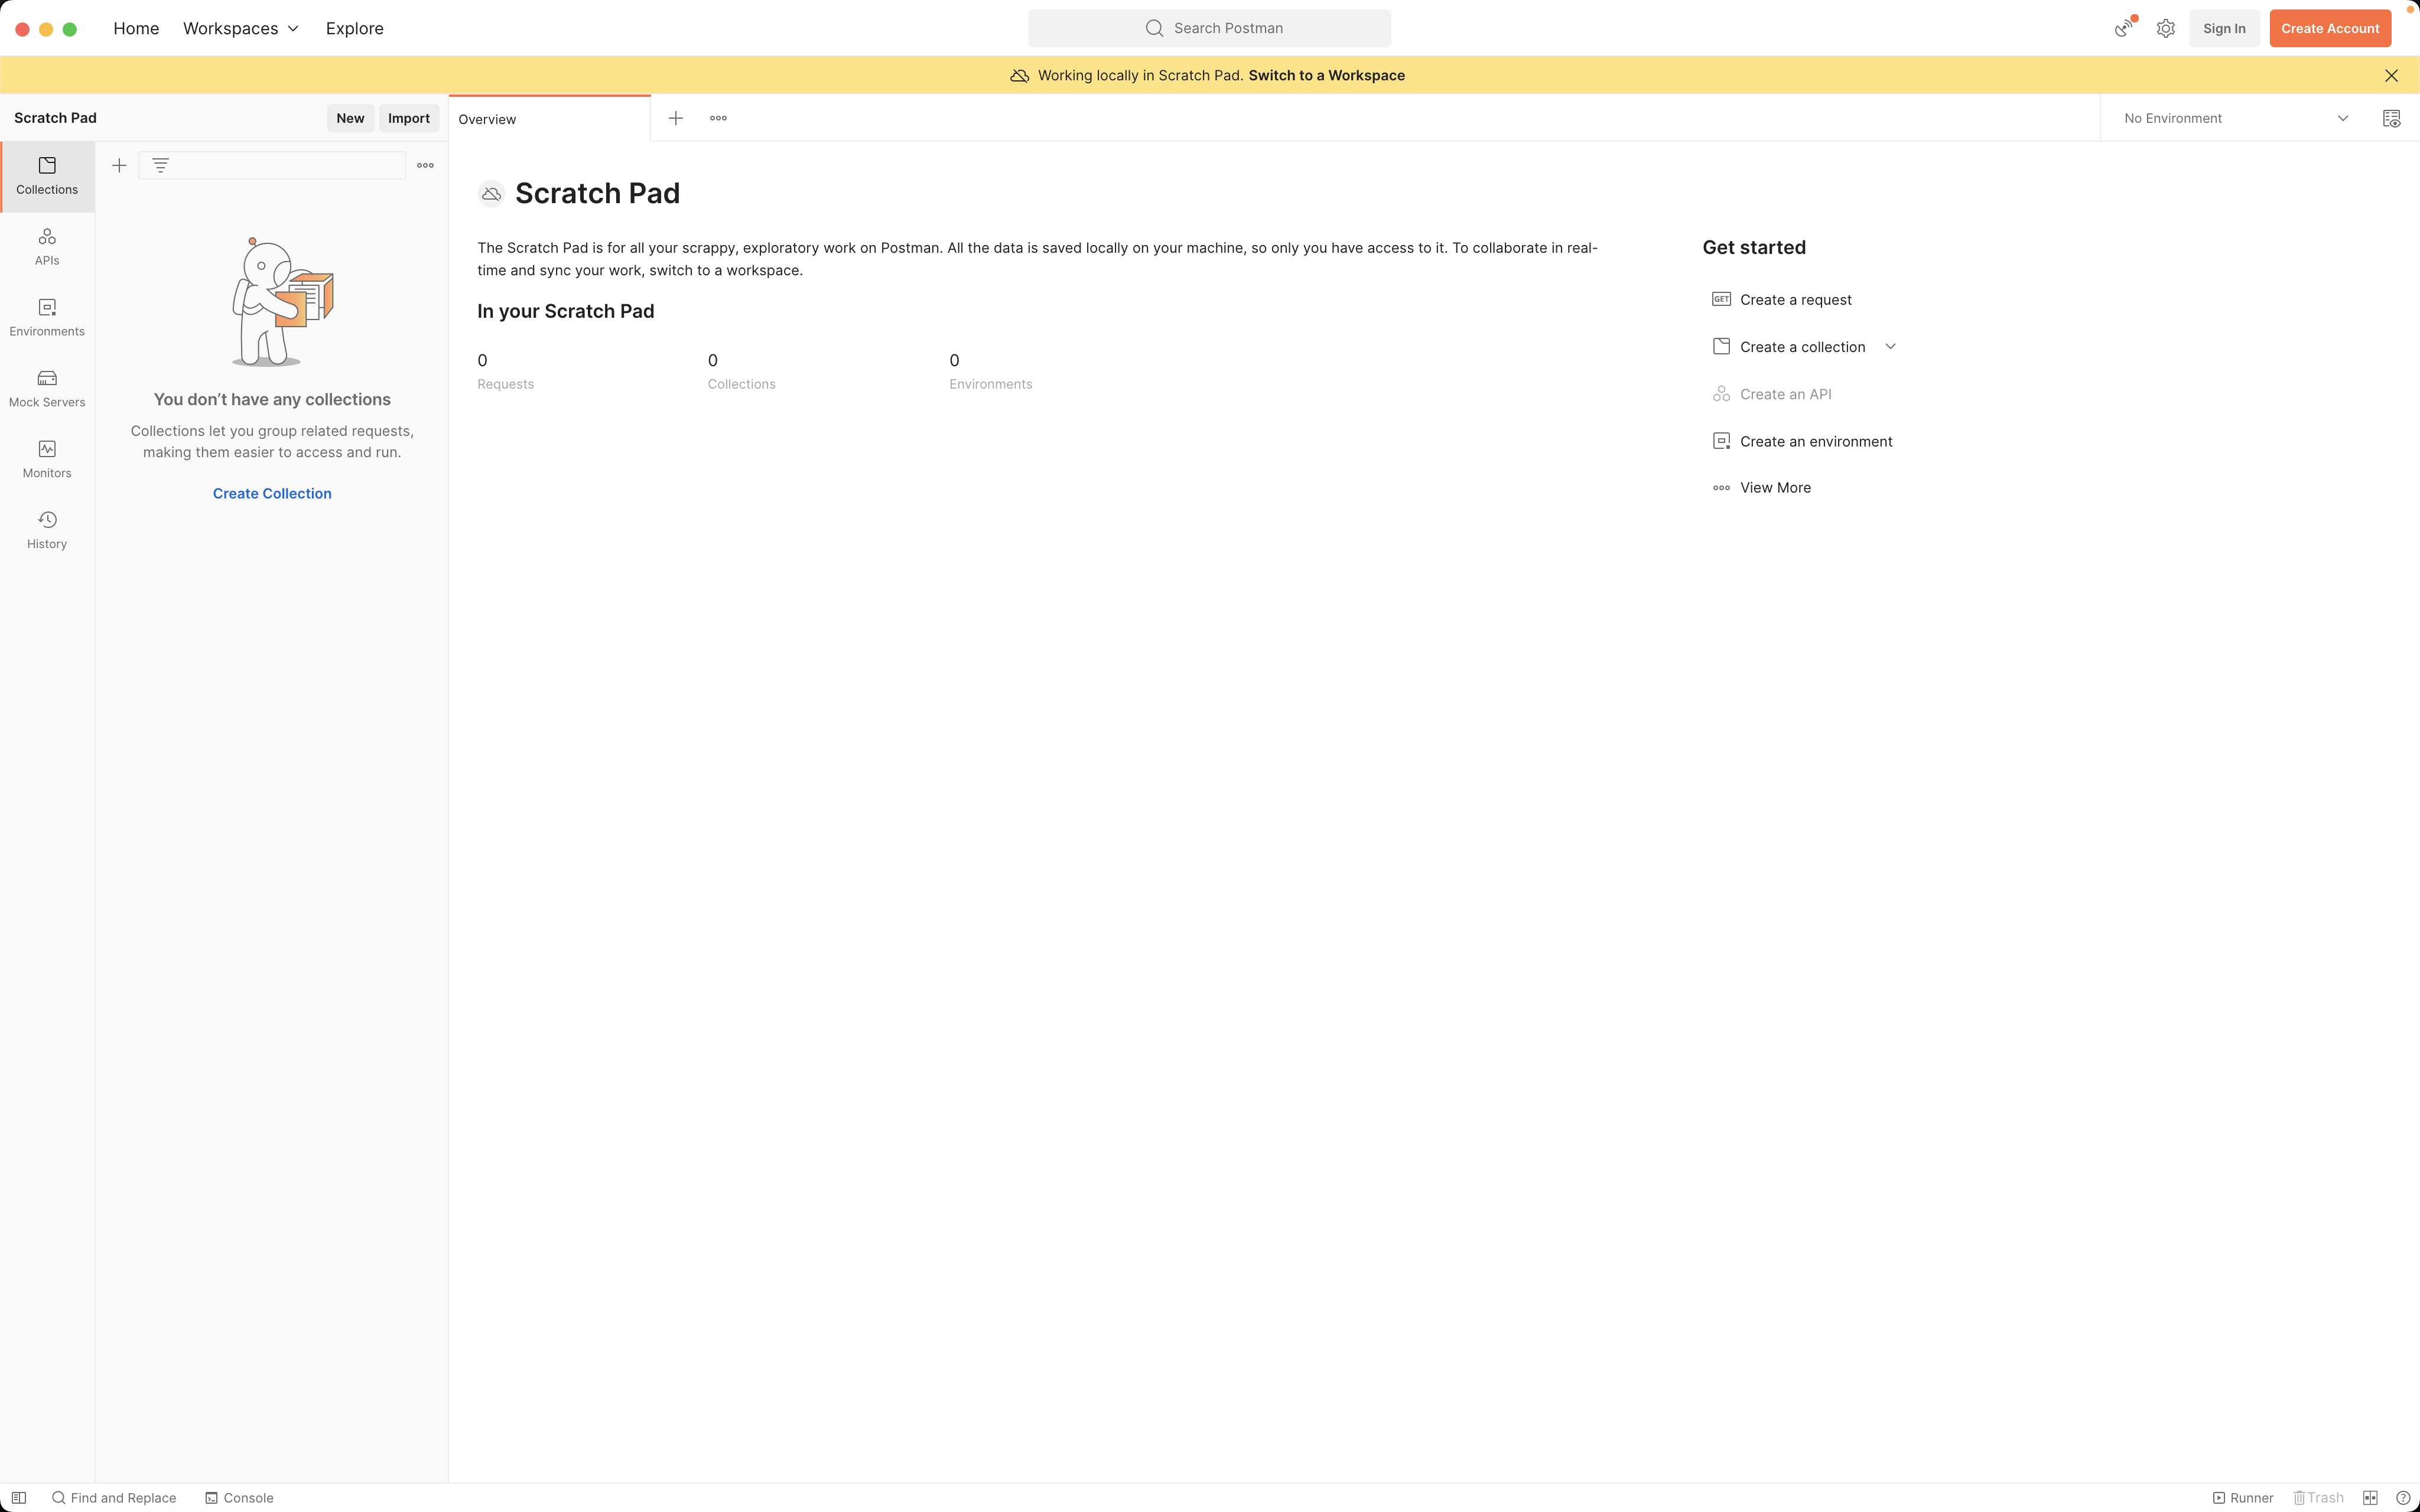
grab it from the official page. Fire it up a first
time, and you are welcomed by this screen.
First start
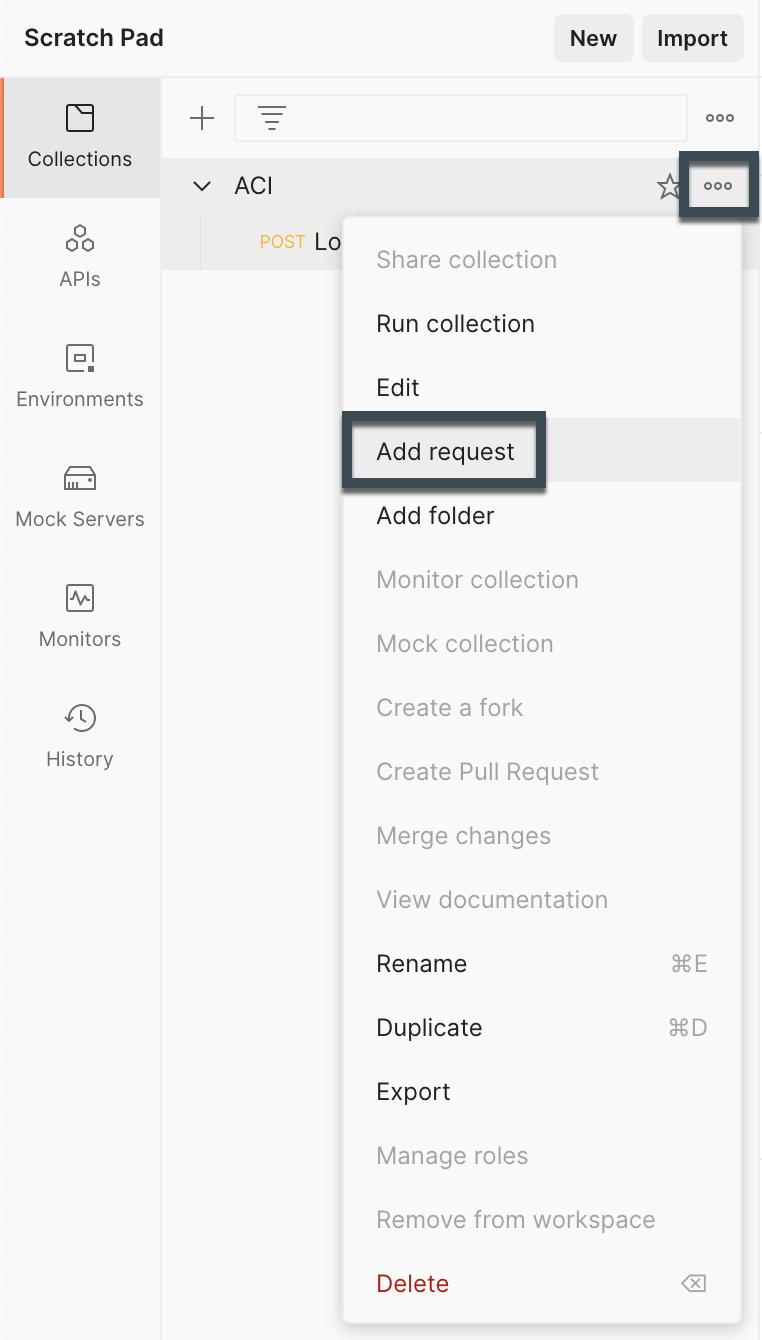
What I would recommend, is to create a Collection for everything ACI related. This helps to have the ACI API related requests together.
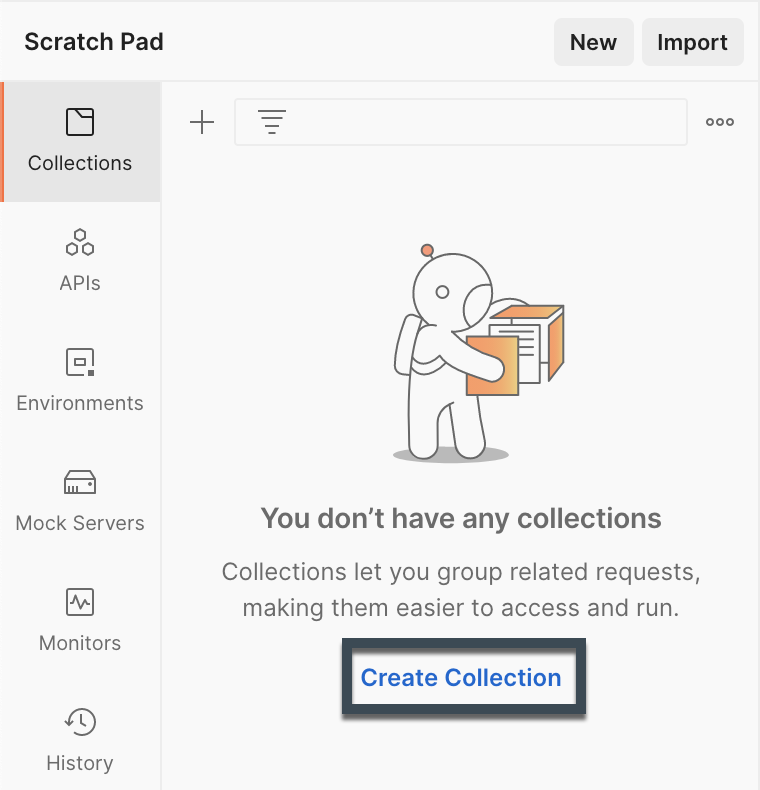
You can name the collection in any way that make sense to you, I went for the simple “ACI”.
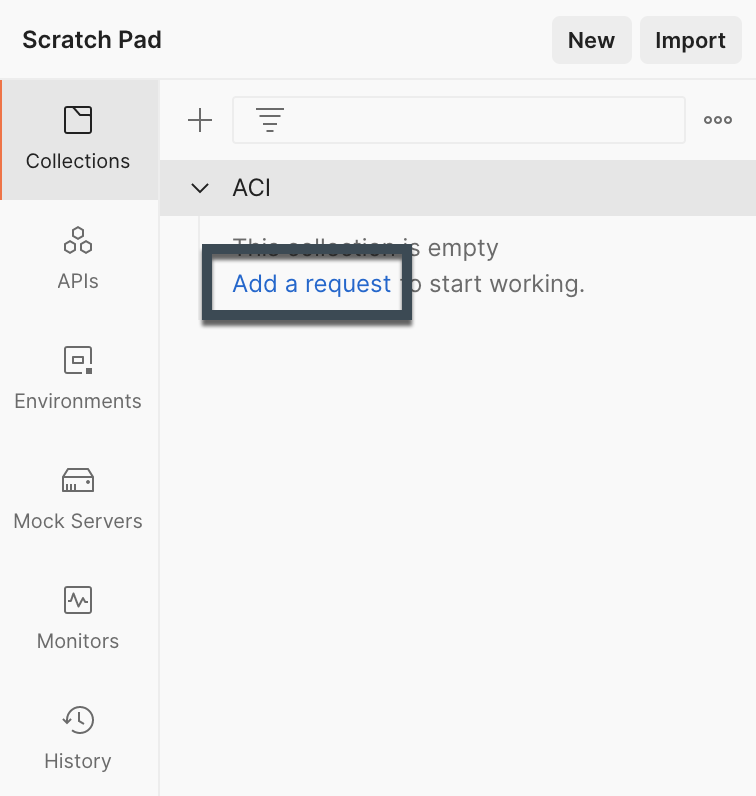
After we have created our collection, it’s time to create the first Postman request. First thing we need is to login to the APIC, which grants us a Cookie for the further calls we plan to do.
Login
Alright, so I created a new request, and we need to add some stuff to make the login to ACI API work.
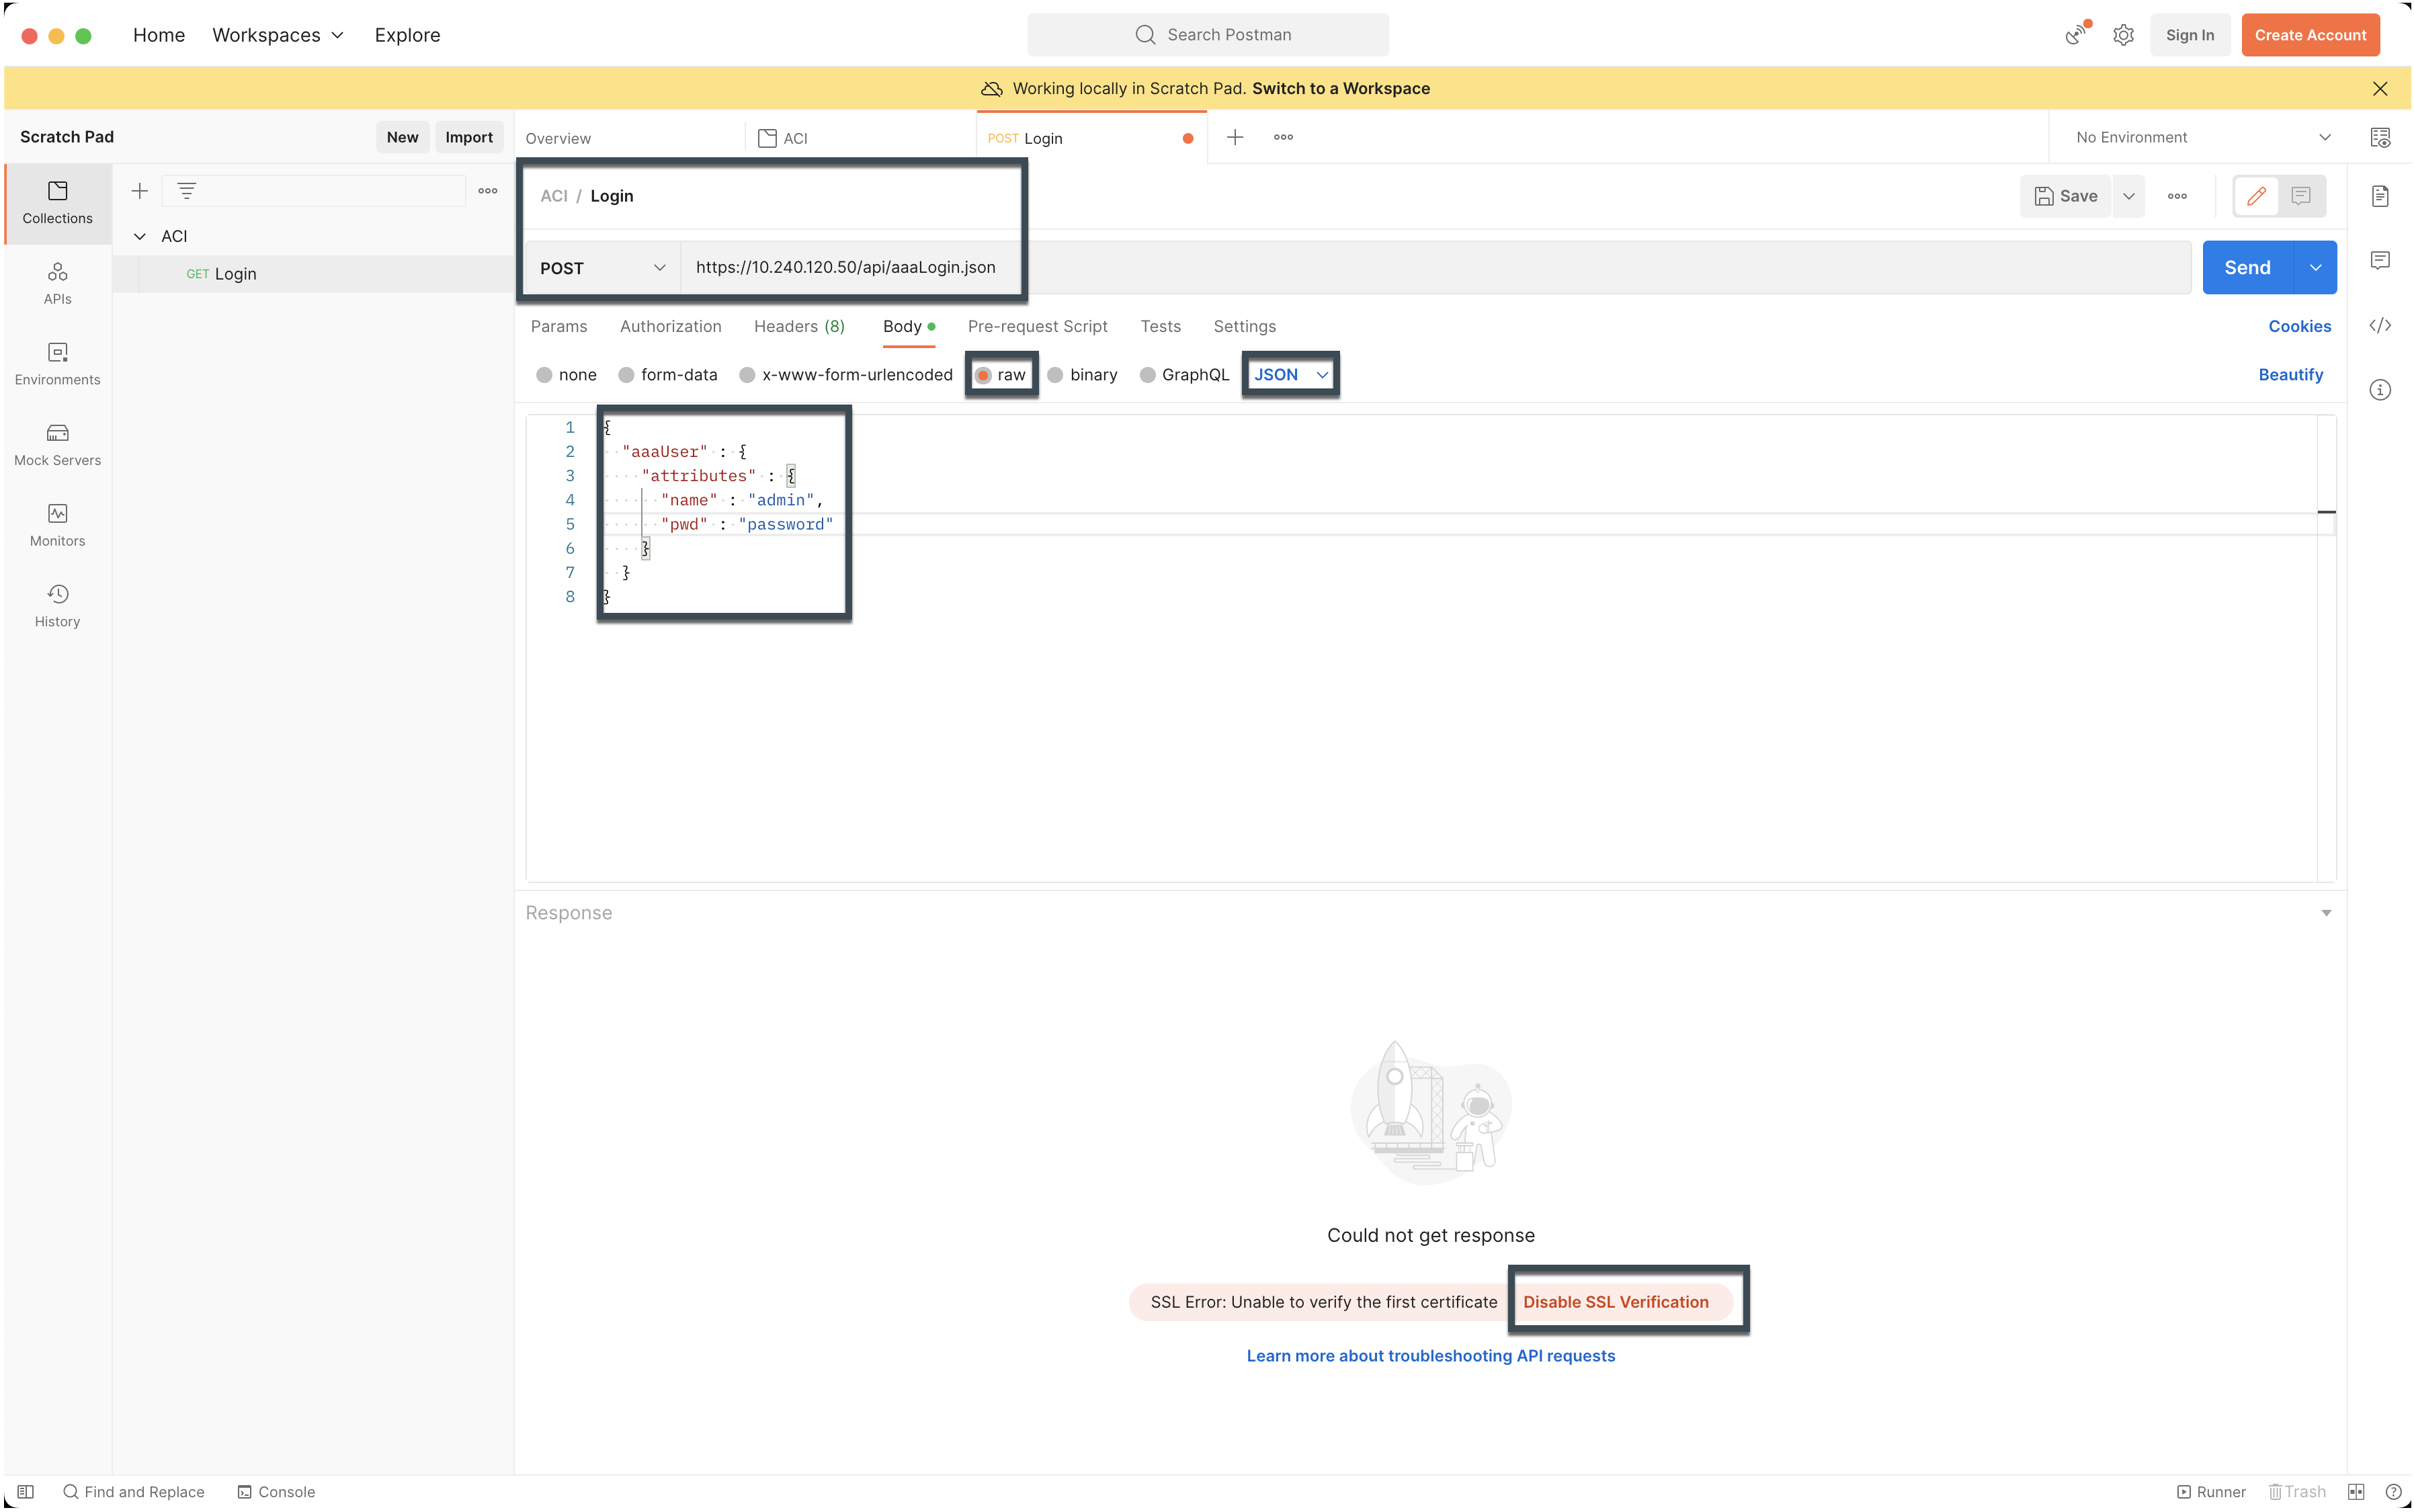
I named the request itself “Login”, but you are again free to use whatever suits you.
The request type hast to be POST and the URL is
https://<IP_OR_HOSTNAME>/api/aaaLogin.json.
For the body you go first for raw and then change the Text dropdown to
JSON. Then you use the following JSON and change the user & password
according to your settings.
|
|
With these parameters and configuration in place, you can trigger the first Postman call to the API. This can result in an SSL error, if your APIC just have a self-signed certificated.
If this is the case you can make sure that the SSL cert is valid or Disable SSL Verfication to make sure that the call go through.
Postman is pretty smart and directly handles cookies for us, so we don’t need to save any information from the response. The further calls will directly include the cookie we got returned and are therefore permitted on the ACI API.
First Call
To a class
With the cookie in place from the login call, we can now start with our real requests to the API.
The calls to the API of ACI have two main categories
- Calls to a specific object through a DN
- Calls to a class through the class identifier
We start with a call to a class and check what we get as a return. For now, we
got with the tenant class, which is fvTenant.
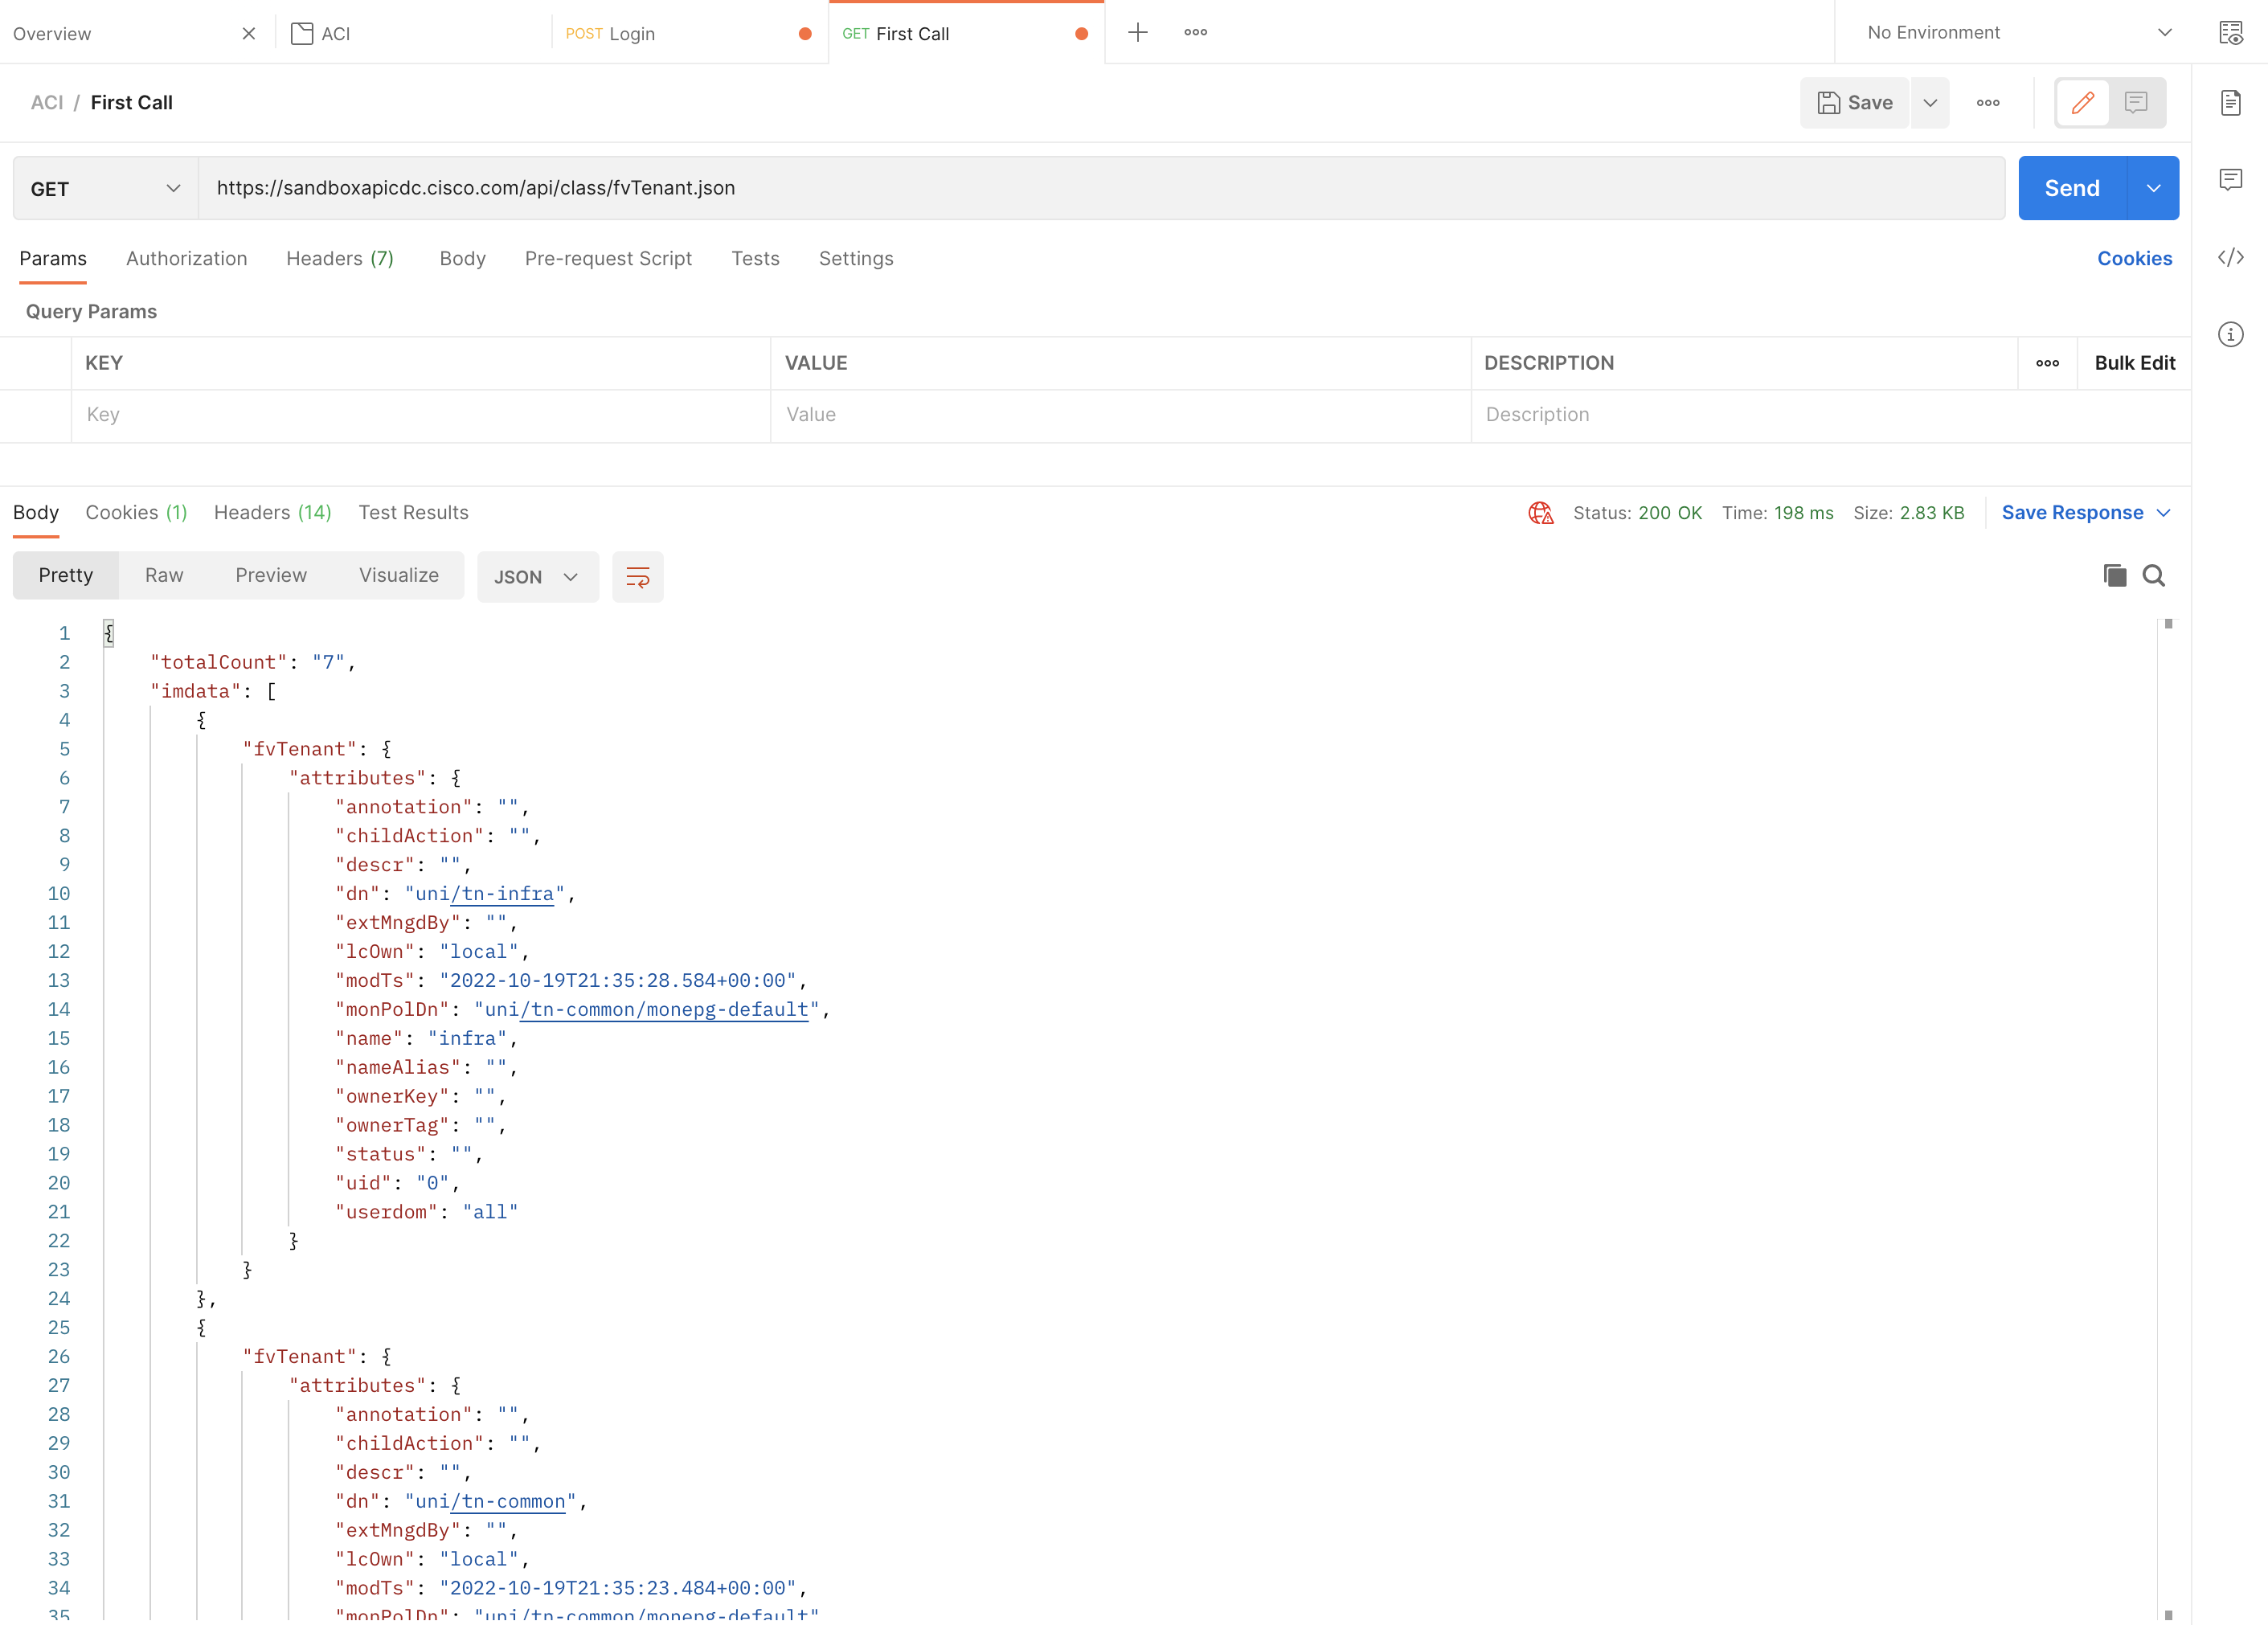
The URL format for class based requests is always in the pattern of
<base-url>/class/<class-name>.<json/xml>?<optional-parameters>. For our
Tenant example this means
https://<IP_OR_HOSTNAME>/api/class/fvTenant.json.
The return has always the same structure, you get a Dictionary with 2 keys
- totalCount
- imdata
totalCount informs you how many items matched your request, so in my case we
have 7 Tenants total. This information can be especially useful if you work
with filters and pagination.
imdata is the data itself, so we get one dict inside the imdata list for
each object returned.
To a DN
Now we can do the same thing for a DN, the URL format is a little different.
<base-url>/mo/<dn-path>.<json/xml>?<optional-parameters>. I did the call for
the infra Tenant, so my URL looked like this
https://<IP_OR_HOSTNAME>/api/mo/uni/tn-infra.json. This returns now just a
single object, but the object itself looks the same so far.
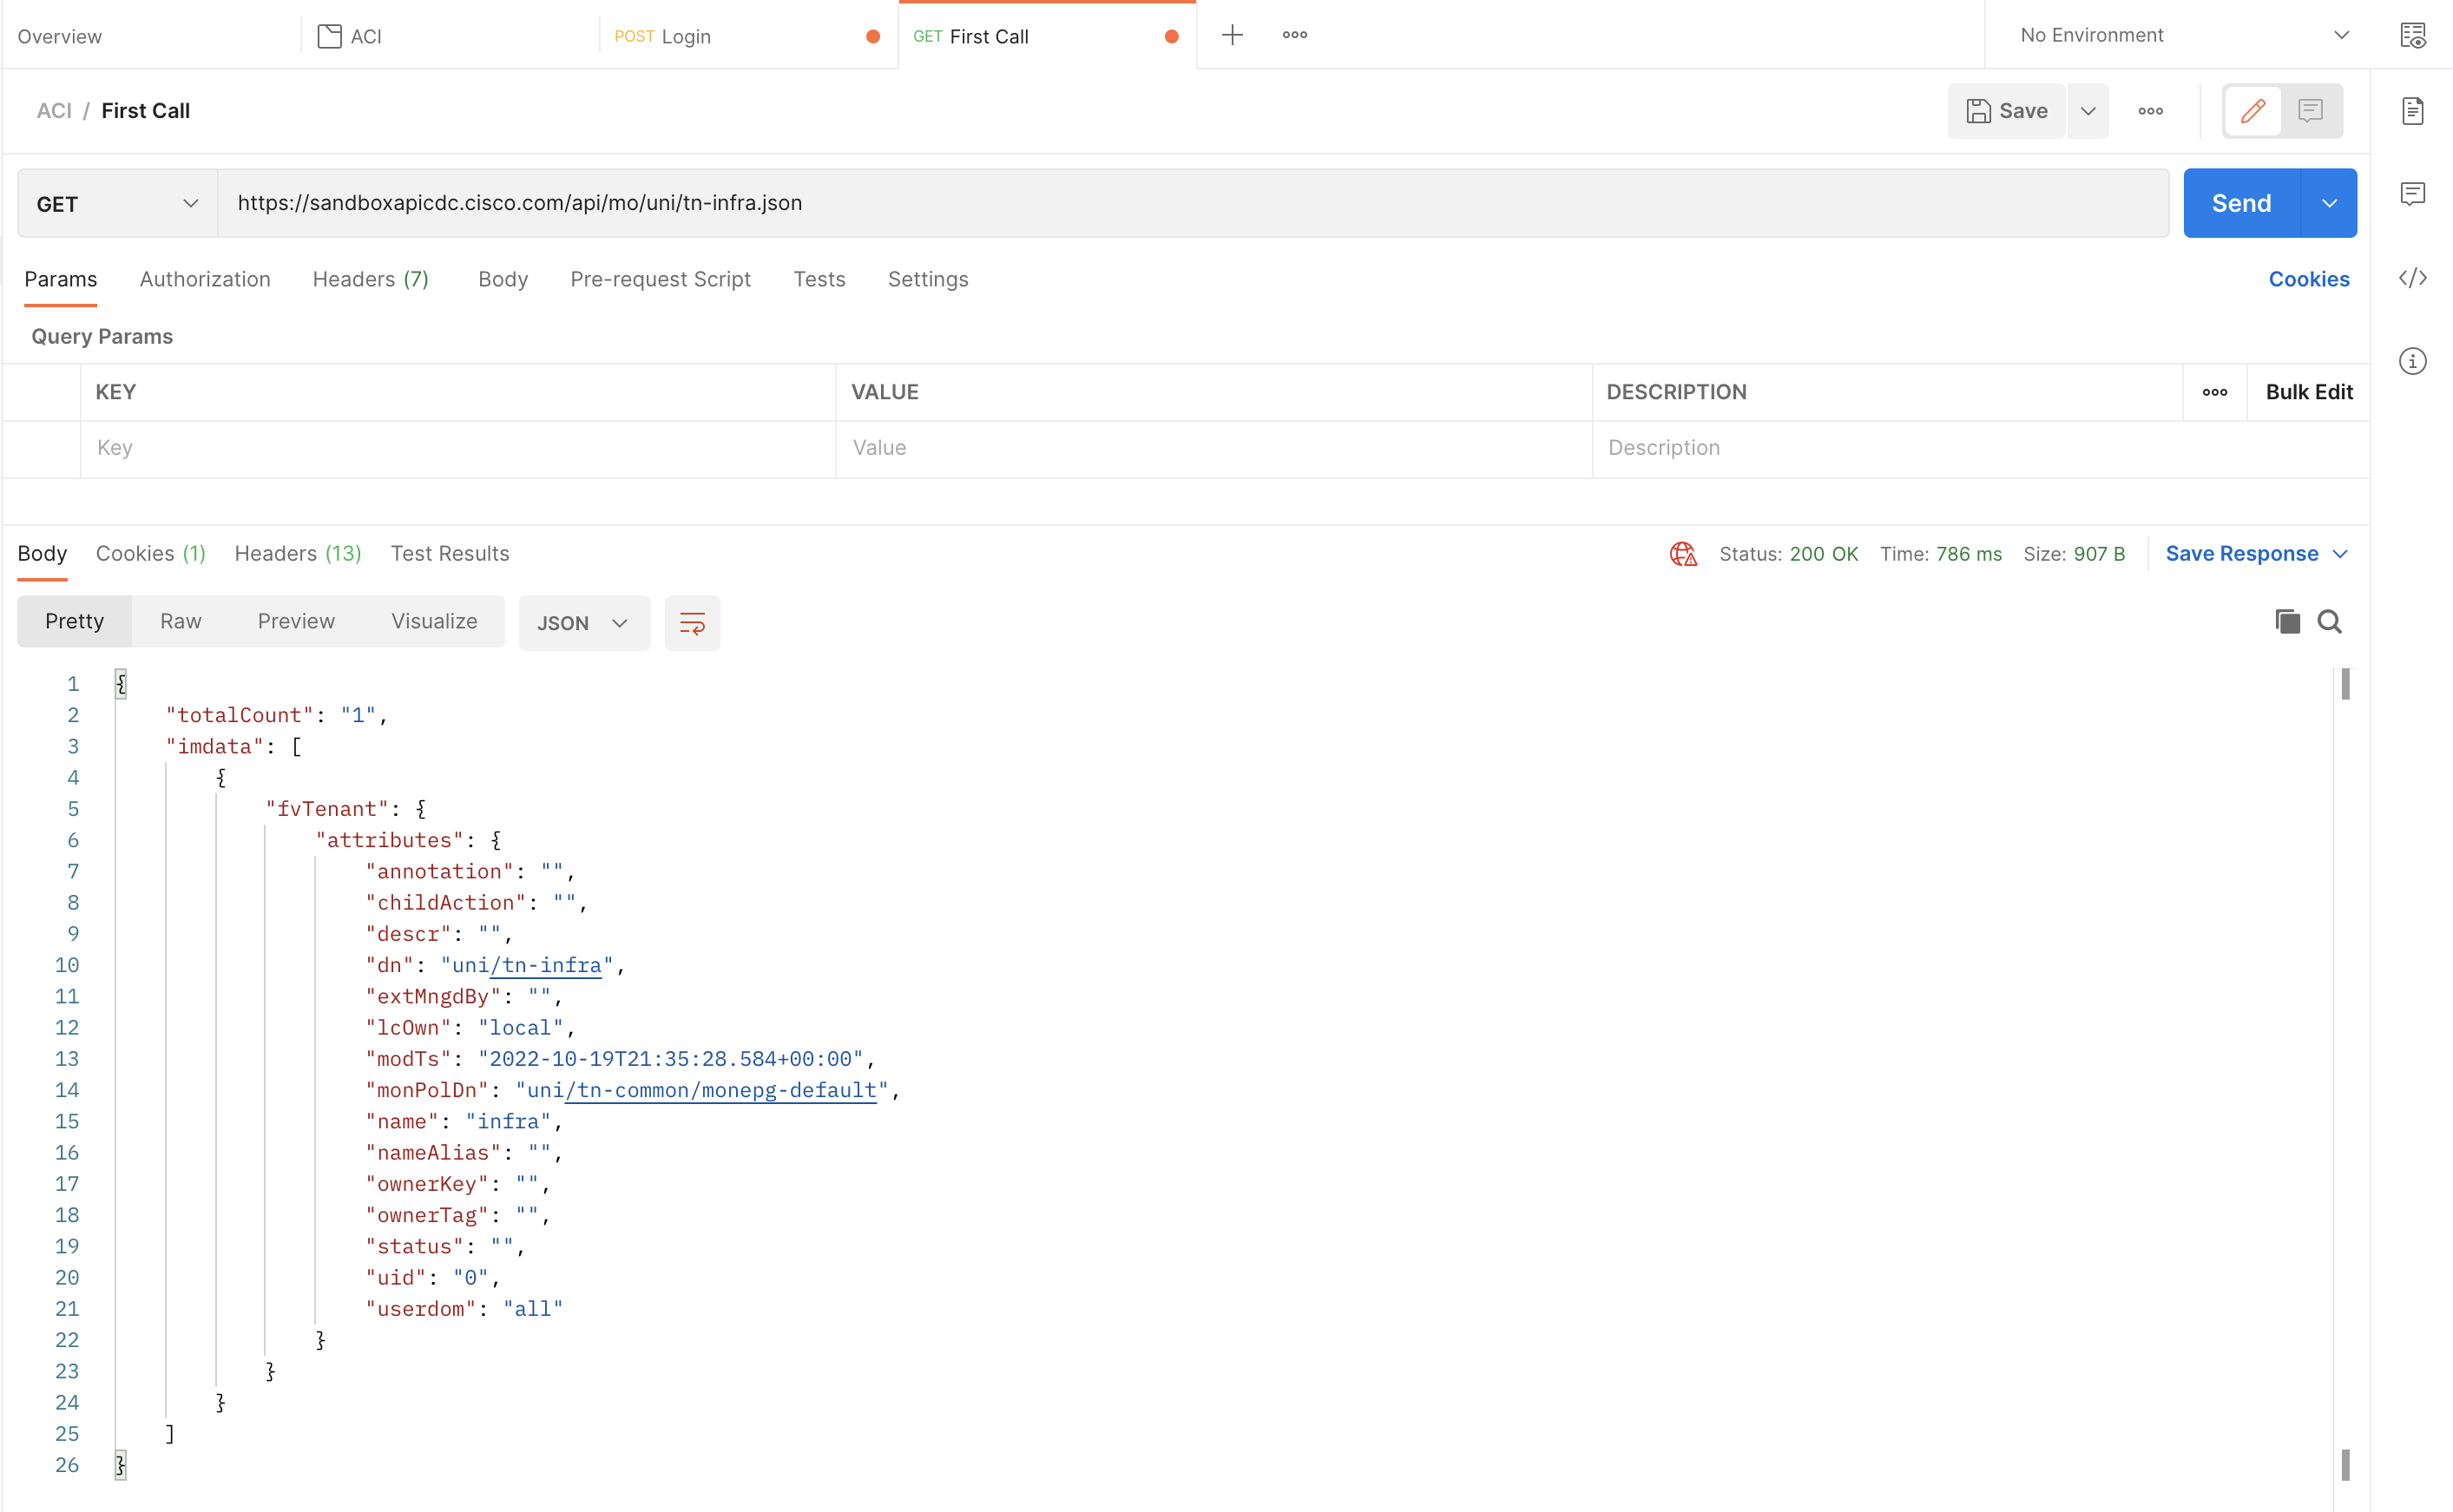
It’s important to always use the full DN as it appears in the object.
Optional Parameters
Often you want maybe a bit more information in the responses you get from the API. Or you want to filter the request to just return object that matches a specific pattern. We won’t cover all the possible options in this blog post, but I want to show you some of the most important parameters for the Cisco ACI API.
-
rsp-prop-include=config-only
- With this option set, the response only include properties that are configurable. Really useful if you want to fetch an object, change part of the configuration and repost it.
-
rsp-subtree=children
- Return not only the requested DN/Class but also all the children of the returned object.
-
rsp-subtree=full
- Return not only the requested DN/Class but also all the children, grandchildren and so on. The whole subtree beneath the requested DN/Class.
These two are the ones that I use by far the most, some more advanced stuff like filtering will be covered in another Blog post.
If we now rerun on of the earlier calls, we get a different result. Let’s use
the DN example and add the rsp-subtree option.
https://<IP_OR_HOSTNAME>/api/mo/uni/tn-infra.json?rsp-subtree=children
Now you will see all sorts of children in the return, for example the Bridge Domains (fvBD), EPGs (fvAEPg) and a lot more.
Post Call
Alright, so far we did some basic fetching of objects through the Cisco ACI API, now we start with the really fun stuff, object creation!
There is one additional important concept here, you have to specify the path to which you want to POST your object. You could use different paths in your requests and then go for relative paths in the object description, but I would advise against it.
My recommendation is to always post against api/mo.json and specify the full
path in the object data
To make a bit more clear what I mean by that, let’s create some objects through the API.
Create an object
We create another request in our Postman application and then change the type
to POST, for the URL we use https://<IP_OR_HOSTNAME>/api/mo.json. As we
want to create an object, we need to provide a Body with the JSON data (I don’t
cover XML… ;-)) of our new object.
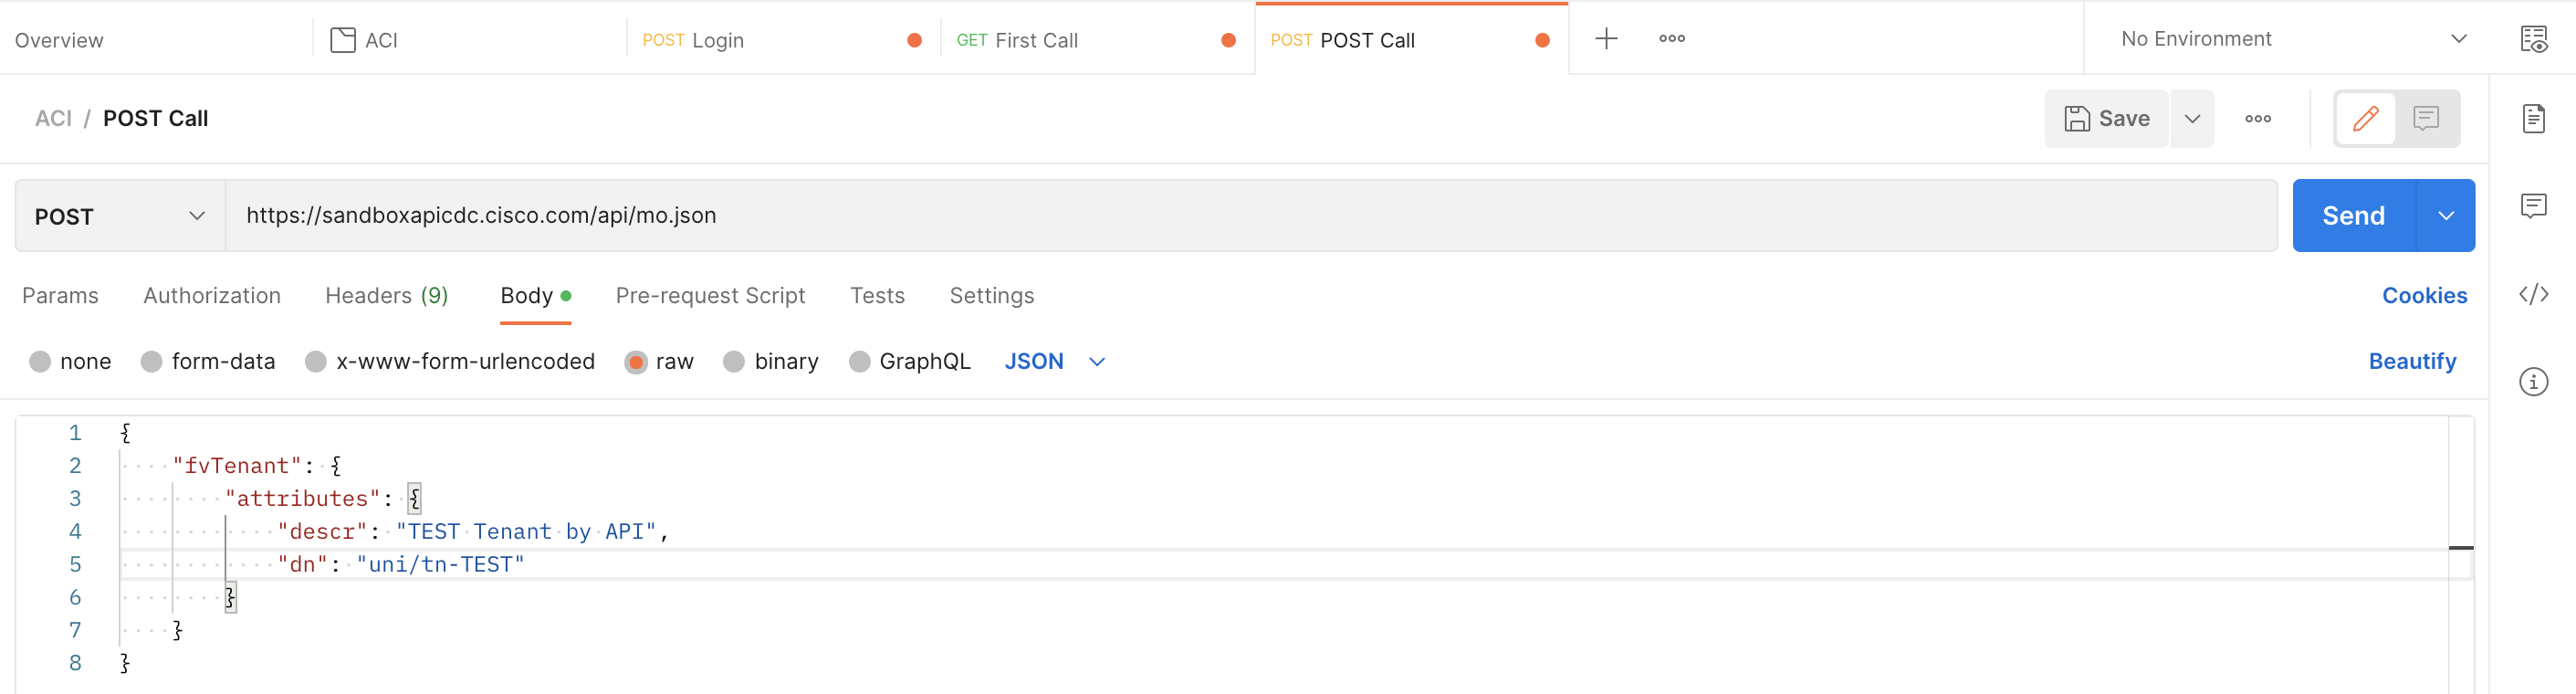
In the data you have only to specify the fields that you want to configure, in
our case we could leave descr away, and it would work fine as well.
But you always need to specify the full DN
|
|
Another important point here is, that you are not allowed to post any of the
properties that are not configurable. This is the reason why the
rsp-prop-include=config-only parameter can be really helpful to only get the
properties that are configurable.
If you now check the GUI, you will see your Postman created Tenant there!

Delete an object
Now we want to clean-up our new Tenant again, this can also be done through the API. There are two approaches here:
- Use a
DELETEcall to the DN - Specify the
"status": "deleted"attribute in yourPOSTcall
DELETE Method
The first way is straight forward, you use the same pattern as we used in our
get call to a dn but instead of method GET we used DELETE. We
then don’t need a body, as the DELETE method combined with the DN in the URL
is enough for ACI to understand our intent.

Be careful with these calls, if you by accident leave part of the DN, you maybe delete a Parent which wasn’t intended
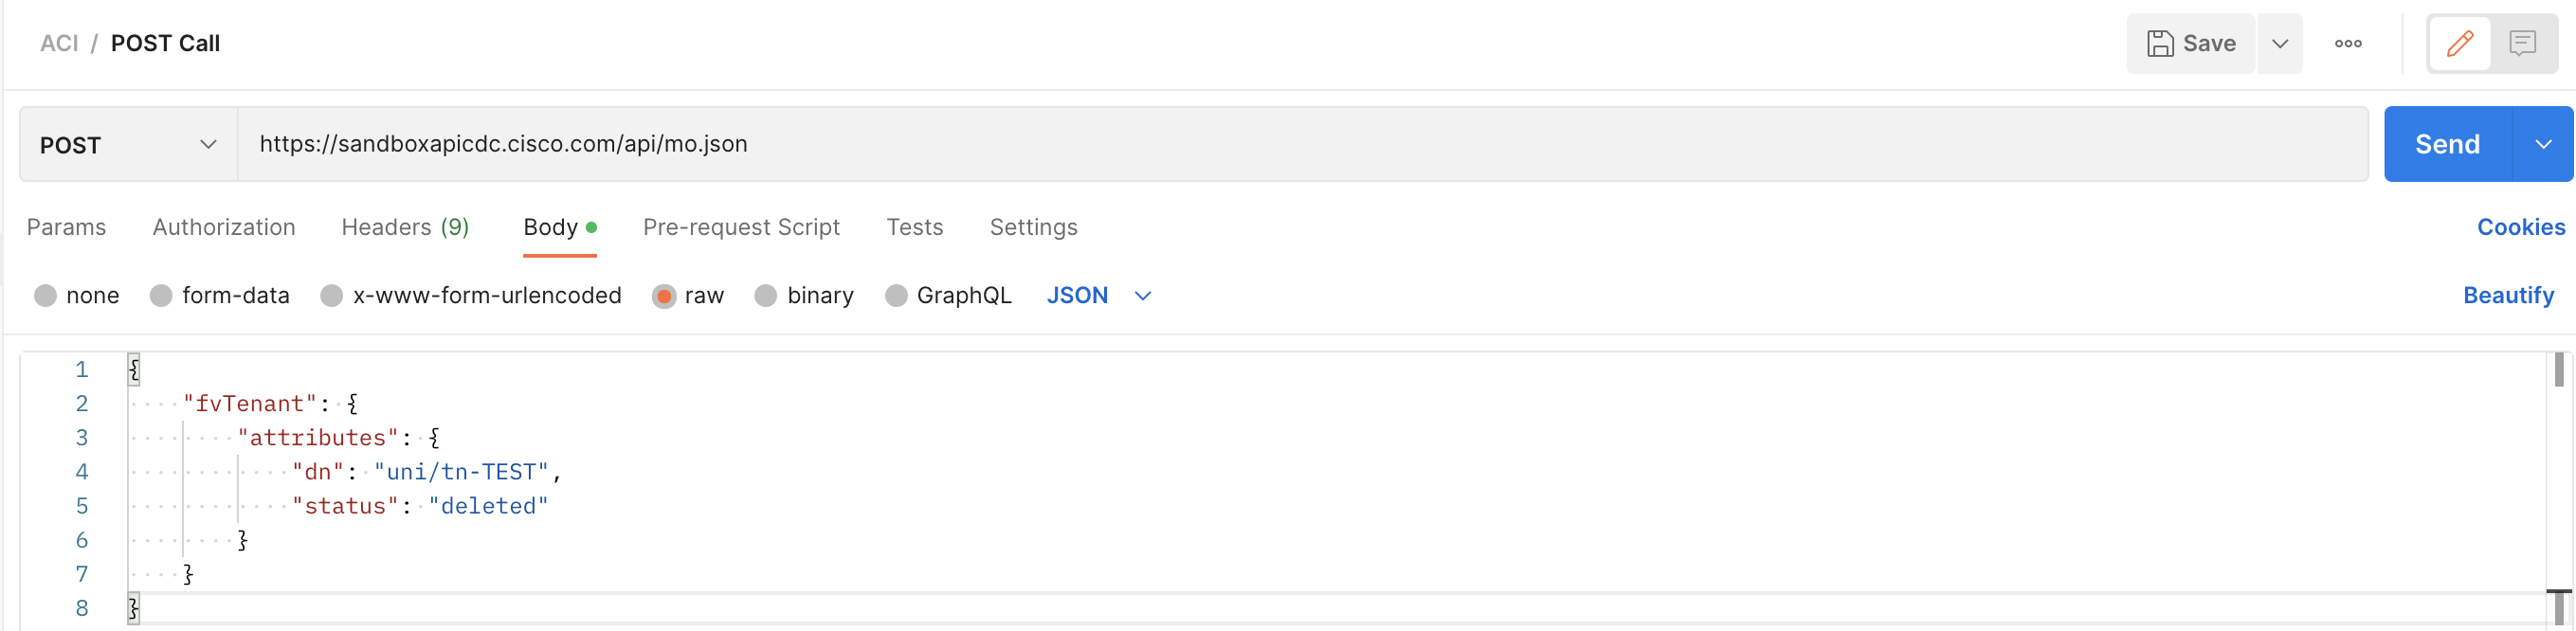
"status": "deleted" attribute
Here we work again with the same approach as in the create an
object chapter. So we use again the POST method and a
JSON body, which only needs to include the DN and the "status": "deleted"
attribute.
|
|
The outcome is the same for both ways, personally I tend more to the "status": "deleted" variation, but I guess this is personal preference.
Examples of Postman with Cisco ACI
So far we covered the most important methods and ways to get data from the Cisco ACI API with Postman. But all the calls could also be done through CURL, a Python script or any other tools out there :)
In this last chapter I want to provide you with some calls that are helpful and hopefully make starting out easier for you.
Create an EPG with Static Bindings
Let’s say you have to deploy a new EPG that is mapped to all the server ports. This task can be easily done through the API and the call is reusable for additional EPG’s in the future.
We stay with the URL in the format https://<IP_OR_HOSTNAME>/api/mo.json and
then have a bit a bigger body for this call. The assumption here is that the
Tenant already exists and has the required VRF & BD configuration in place.
|
|
The EPG object can be extended according to your requirements, but I think it should give a good idea how to structure the overall call.
Of course, you can also add more fvRsPathAtt objects (Static Bindings) or
some different children (e.g. Contracts).
Create an BD + EPG pair
This can be seen as an alternative/extension of the Create an EPG with Static Bindings approach. We create not only an EPG, but also a BD. This makes sense for setups that use a 1:1 mapping between EPG and BD.
URL will stay again the same https://<IP_OR_HOSTNAME>/api/mo.json, data in
this case would be:
|
|
Here one difference is that the EPG now only contains a name and no longer a DN, as the DN is relative to the Tenant itself.
Create a new VPC policy
If most of your VPC policies look the same, then this is a great opportunity to use automation to create all the different VPC policies that you need.
This simple example shows how you could use a template to create VPC policies that look all the same, here just with CDP & LLDP configured. So you can easily extend it as needed.
|
|
Get the Audit messages for a specific date
Sometimes you want to check only part of the Audit log history, maybe you know a date range for which you would like to get some details. This can be done with some additional filtering, which we didn’t cover so far.
A simple GET request to the URL will do the job:
https://<IP_OR_HOSTNAME>/api/node/class/aaaModLR.json?query-target-filter=bw(aaaModLR.created, "2022-10-19", "2022-10-20")
Replace the dates with ones that fit your request, and you get a filtered ACI Audit Log in return.
Get the Event messages for a specific date
The same we did with the audit log, can be done for the Event log. But depending on the fabric, this can still be a lot of output.
https://<IP_OR_HOSTNAME>/api/node/class/eventRecord.json?query-target-filter=bw(eventRecord.created, "2022-10-19", "2022-10-20")
It’s also possible to use Hours in the filter, this would look like this:
https://<IP_OR_HOSTNAME>/api/node/class/eventRecord.json?query-target-filter=bw(eventRecord.created, "2022-10-20T07:00:00", "2022-10-20T08:00:00")